Serverless 架构应用开发:基于 Auth0 授权的 Serverless 应用登录
在多次尝试了使用 Amazon Cognito 前端授权无果,我转而使用和其它教程类似的 Auth0 授权登录。虽然 Amazon 提供了一个用于 Cognito 授权的前端组件,但是它仍然不是很成熟。在浏览器端,好像用得不是很普遍,而 Auth0 则是一个更通用的方案。
Auth0 是一家“身份验证即服务”提供商,旨在为开发人员提供简单易用的身份管理服务。为了保持灵活性和可扩展性,Auth0 身份管理平台允许开发人员在身份验证和授权管道中增加自定义代码。
最后的代码见:auth0-frontend
代码的执行逻辑如下所示:
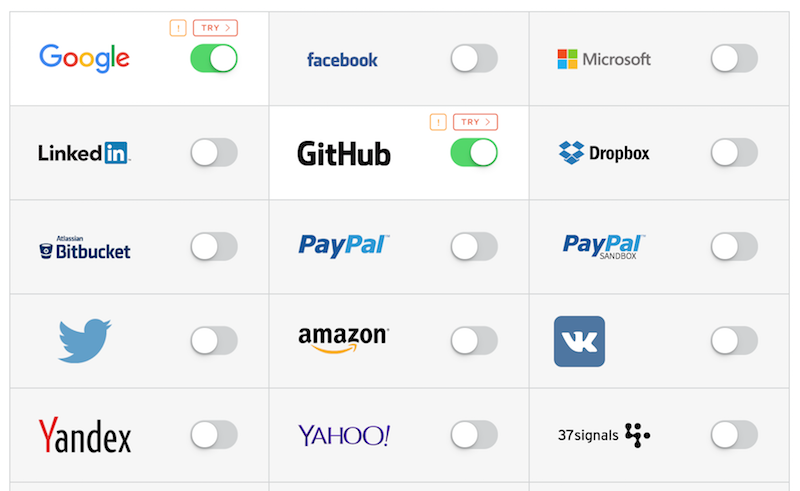
- 由前端使用 Auth0 的 lock.js 调出授权框,进行用户授权
- 用户可以选择使用第三方授权服务登录,如 Google、GitHub
- 用户登录完后,会获取一个 Auth0 的 Token,通过该 Token 去请求数据
- 后台接到数据后,先验证 Token 是否有效的,然后返回相应的结果
因此,对于我们而言,我们需要做这么一些事:
- 创建一个 Serverless 服务
- 创建一个验证 Token 的 Lambda 函数
- 注册 Auth0 账户
- 绑定 Auth0 的 GitHub 授权
这里我们采用的是 Serverless Framework 的官方示例 Demo。稍有不同的是,代码中对静态文件和 S3 部分进行了一些优化——官方的 DEMO,无法直接部署到 S3 上。
Serverless Auth0 前端代码
在这次的教程里,代码分为两部分:前端和后台。
这里的前端代码,是一个纯前端的代码。
先让我们看看授权部分:
const lock = new Auth0Lock(AUTH0_CLIENT_ID, AUTH0_DOMAIN);

...

lock.show((err, profile, token) => {
    if (err) {
      console.error('Something went wrong: ', err);
    } else {
      localStorage.setItem('userToken', token);
      localStorage.setItem('profile', JSON.stringify(profile));
      ...
    }
  });
首先,我们创建了一个 Auth0Lock 对象,并在参数中转入了对应的 ID 和 Auth0 域名。然后使用 lock.show 方法将调出 Auth0 的登录页面,当用户登录成功的时候,就会从后台取到 token 和 profile,然后我们在上面的代码中保存用户的 token 和 profile 到 localstorage 中。
然后在发送 fetch 请求的时候,我们会带上这个 Token:
const token = localStorage.getItem('userToken');
if (!token) {
  return false;
}
const getdata = fetch(PRIVATE_ENDPOINT, {
  headers: {
    Authorization: `Bearer ${token}`,
  },
  method: 'GET',
  cache: 'no-store',
});

getdata.then((response) => {
  response.json().then((data) => {
    console.log('Token:', data);
  });
});
主要的前端逻辑代码就是这么简单。
Serverless Auth0 后台代码
首先,先让我们看一眼 serverless.yml 配置。
serverless.yml 配置
functions:
  auth:
    handler: handler.auth
    environment:
      AUTH0_ID: ${file(./config.yml):AUTH0_ID}
      AUTH0_SECRET: ${file(./config.yml):AUTH0_SECRET}

  publicEndpoint:
    handler: handler.publicEndpoint
    events:
      - http:
          path: api/public
          method: get
          integration: lambda
          cors: true
  privateEndpoint:
    handler: handler.privateEndpoint
    events:
      - http:
          path: api/private
          method: get
          integration: lambda
          authorizer: auth # See custom authorizer docs here: http://bit.ly/2gXw9pO
          cors:
            origins:
              - '*'
            headers:
              - Content-Type
              - X-Amz-Date
              - Authorization
              - X-Api-Key
              - X-Amz-Security-Token
配置中定义了三个 lambda 函数:
- auth 函数,用于对用户传过来的 Token 进行校验
- publicEndpoint 函数,一个公开的 API 结点
- privateEndpoint 函数,一个需授权才能访问的 API,即它将调用 auth 函数,根据授权结果来返回相应的内容。
更详细的资料,可以访问官方的文档:使用 API Gateway 自定义授权方。
auth 函数的代码如下所示:
const jwt = require('jsonwebtoken');
...
const jwt = require('jsonwebtoken');
  if (event.authorizationToken) {
    // remove "bearer " from token
    const token = event.authorizationToken.substring(7);
    const options = {
      audience: AUTH0_CLIENT_ID,
    };
    jwt.verify(token, AUTH0_CLIENT_SECRET, options, (err, decoded) => {
      if (err) {
        cb('Unauthorized');
      } else {
        cb(null, generatePolicy(decoded.sub, 'Allow', event.methodArn));
      }
    });
  } else {
    cb('Unauthorized');
  }
};
代码中的主要函数是 jwt.verify,它将根据 AUTH0 的 ID 和密钥来校验 token 是否是有效的。同时,还引用了一个名为 generatePolicy 的方法:
const generatePolicy = (principalId, effect, resource) => {
  const authResponse = {};
  authResponse.principalId = principalId;
  if (effect && resource) {
    const policyDocument = {};
    policyDocument.Version = '2012-10-17';
    policyDocument.Statement = [];
    const statementOne = {};
    statementOne.Action = 'execute-api:Invoke';
    statementOne.Effect = effect;
    statementOne.Resource = resource;
    policyDocument.Statement[0] = statementOne;
    authResponse.policyDocument = policyDocument;
  }
  return authResponse;
};
这个方法用于生成一个 IAM 的策略,这个策略的生成规则建议参考官方文档,以上的内容和 AWS 的官方 DEMO 是一致的。随后,再根据生成的是 'Allow' 或者 'Deny' 来判断,该用户是否拥有权限。如果用户拥有权限的,那么就会继续往下执行:
module.exports.privateEndpoint = (event, context, cb) => {
  cb(null, { message: 'Only logged in users can see this' });
};
说了这么多,还是让我们跑跑代码吧。
配置及部署
在这一个步骤里我们要做这么几件事:
- 注册、获取 Auth0 的账号
- 部署 Lambda 函数,获取后台 API 地址
- 根据上一步生成的地址,修改前端代码中的地址
因此在开始之前,需要先申请一个 Auth0 的账号,然后在 config.yml 中,添加 auth0 的 id 和密钥。
然后执行部署:
···
........................................................................
Serverless: Stack update finished...
Service Information
service: auth0-frontend
stage: dev
region: us-east-1
stack: auth0-frontend-dev
api keys:
  None
endpoints:
  GET - https://fy0qtq1r8c.execute-api.us-east-1.amazonaws.com/dev/api/public
  GET - https://fy0qtq1r8c.execute-api.us-east-1.amazonaws.com/dev/api/private
functions:
  auth: auth0-frontend-dev-auth
  publicEndpoint: auth0-frontend-dev-publicEndpoint
  privateEndpoint: auth0-frontend-dev-privateEndpoint
将生成的 API Gateway 的地方放入到 client/dist/app.js 文件中:
再执行:
$ serverless client deploy以部署我们的静态文件。
Serverless: Deploying client to stage "dev" in region "us-east-1"...
Serverless: Creating bucket auth.wdsm.io...
Serverless: Configuring website bucket auth.wdsm.io...
Serverless: Configuring policy for bucket auth.wdsm.io...
Serverless: Configuring CORS policy for bucket auth.wdsm.io...
Serverless: Uploading file app.css to bucket auth.wdsm.io...
Serverless: If successful this should be deployed at: https://s3.amazonaws.com/auth.wdsm.io/app.css
Serverless: Uploading file app.js to bucket auth.wdsm.io...
Serverless: If successful this should be deployed at: https://s3.amazonaws.com/auth.wdsm.io/app.js
Serverless: Uploading file index.html to bucket auth.wdsm.io...
Serverless: If successful this should be deployed at: https://s3.amazonaws.com/auth.wdsm.io/index.html
然后打开 https://s3.amazonaws.com/auth.wdsm.io/index.html 就可以尝试授权。
不过,在那之间,我们需要填写对应平台的授权信息:
接着,点击上面的 GitHub 『!』号,会提示我们填写对应的授权信息。
打开我们的 GitHub ,申请一个新的 OAuth 应用,地址:https://github.com/settings/applications/new
详细的信息见:https://auth0.com/docs/github-clientid。
如我的配置是:
Homepage URL: https://phodal.auth0.com
Authorization callback URL  https://phodal.auth0.com/login/callback
完成后,把生成的 GitHub ID 和 Client Secret 填入。点击 Save,Auth0 就会自动帮我们测试。
接着,再到我们的页面上尝试使用 GitHub 登录,还是报了个错:
app.js:26 Something went wrong:  Error: error: invalid origin: https://s3.amazonaws.com
    at new LoginError (lock-9.0.min.js:9)
    at lock-9.0.min.js:9
    at onMessage (lock-9.0.min.js:10)
漏掉了在 Auth0 的设置页的 Allowed Callback URL 和 Allowed Origins 上加上用于登录的地址,用于允许跨域请求了。在这里,我的地址是:
https://s3.amazonaws.com/auth.wdsm.io/index.html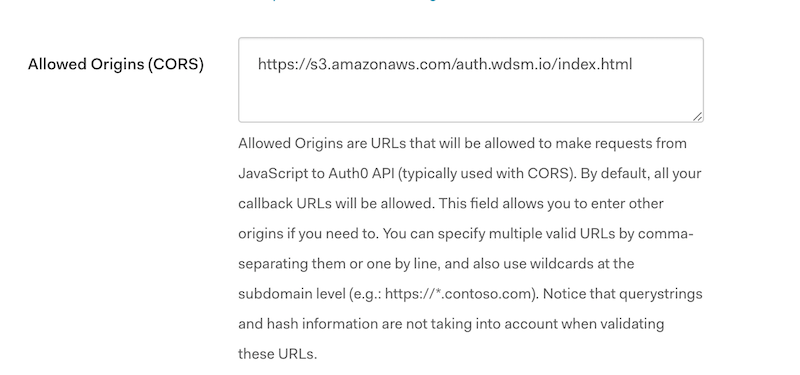
然后,再测试一下登录:
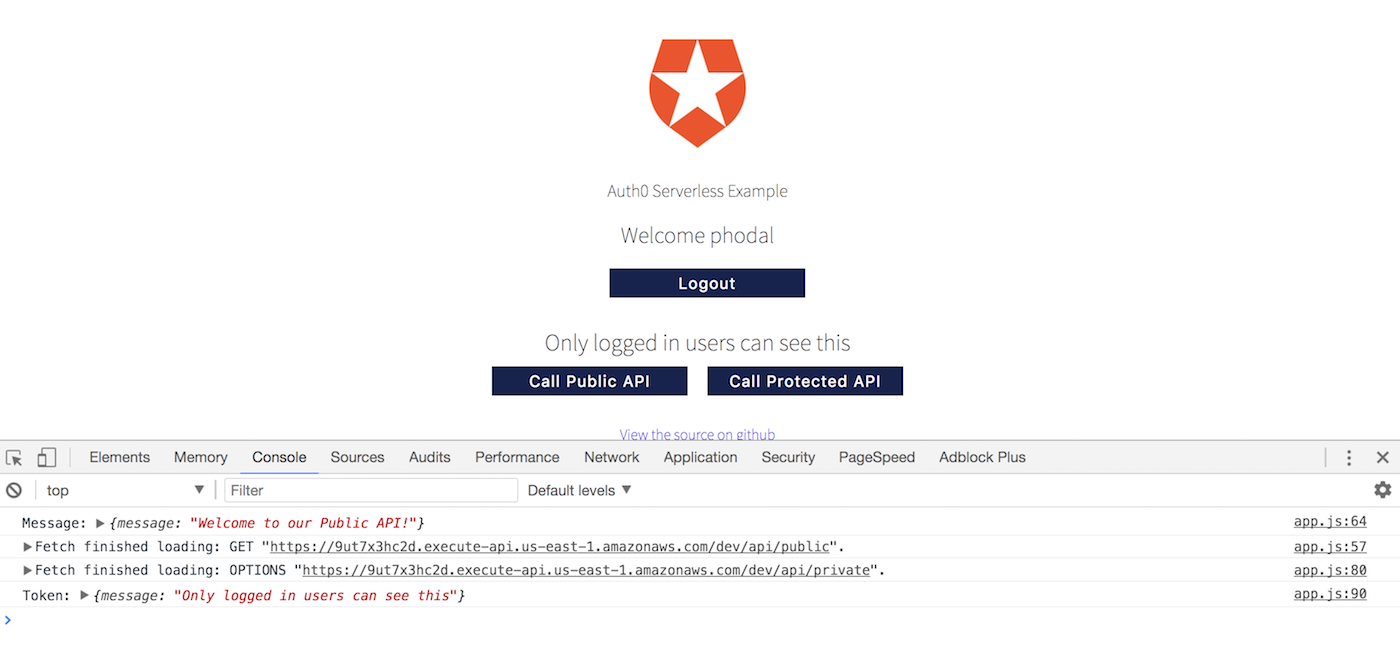
漂亮,我们登录成功了。
清理
- 删除 Auth0 的应用
- 删除 GitHub 的应用
- 清空 Bucket:
serverless client remove - 清空 Lambda:
serverless remove
结论
AWS 官方的 Congito 支持的第三方应用有限,在这个时候 Auth0 成了一个更好的选择。除了 GitHub,Auth0 还集成了微博、人人等等的国内的平台。
当然授权,作为一个基础的服务,几乎是每个应用的重要功能,也是核心的功能。对于大数中大型公司来说,几乎不太可能采用这样的方案。
或许您还需要下面的文章:
围观我的Github Idea墙, 也许,你会遇到心仪的项目
- 设计流动摩擦:AI 原生团队的核心能力
- Piece:将 Coding Agent 的局部构建反馈提速 10x
- 验证工程:从 Vibe 硬件编程 Loop 到自迭代验证
- 长程验证:AI Agent 长任务的收敛机制
- 从复杂编辑器到 Agent 工作台:Office 的 Cursor 时刻
- 注意力 Harness:多 Agent 时代如何守住人的注意力
- Agent 应该如何解决繁杂任务:从 /goal 到长时间运行
- 任务自适应 Harness:从 Trace 到多 Coding Agent 的协作记忆
- 从写清 Spec 到看懂功能:在 Session 历史中使用 Routa 重建需求全景
- Routa 桌面版发布:内建 Harness 工程的 AI Coding 研发协作工作台
 Engineer, Consultant, Writer, Designer
ThoughtWorks 技术专家
工程师 / 咨询师 / 作家 / 设计学徒
开源深度爱好者
出版有《前端架构:从入门到微前端》、《自己动手设计物联网》、《全栈应用开发:精益实践》
联系我: h@phodal.com
微信公众号: 最新技术分享

- opensuse (10)
- django (41)
- arduino (10)
- thoughtworks (18)
- centos (9)
- nginx (18)
- java (10)
- SEO (9)
- iot (47)
- iot system (12)
- RESTful (23)
- refactor (17)
- python (47)
- mezzanine (15)
- test (11)
- design (16)
- linux (14)
- tdd (12)
- ruby (14)
- github (24)
- git (10)
- javascript (52)
- android (36)
- jquery (18)
- rework (13)
- markdown (10)
- nodejs (24)
- google (8)
- code (9)
- macos (9)
- node (11)
- think (8)
- beageek (8)
- underscore (14)
- ux (8)
- microservices (10)
- rethink (9)
- architecture (37)
- backbone (19)
- mustache (9)
- requirejs (11)
- CoAP (21)
- aws (10)
- dsl (9)
- ionic (25)
- Cordova (21)
- angular (16)
- react (14)
- ddd (9)
- summary (9)
- growth (10)
- frontend (14)
- react native (8)
- serverless (32)
- rust (9)
- llm (8)